One of the first decisions new film photographers face is choosing between 35mm and 120 film formats. Both have passionate advocates, distinct characteristics, and different cost structures that can significantly impact your photography journey.
This comprehensive comparison will help you understand the practical differences, costs, and creative implications of each format so you can make an informed decision that aligns with your goals, budget, and shooting style.
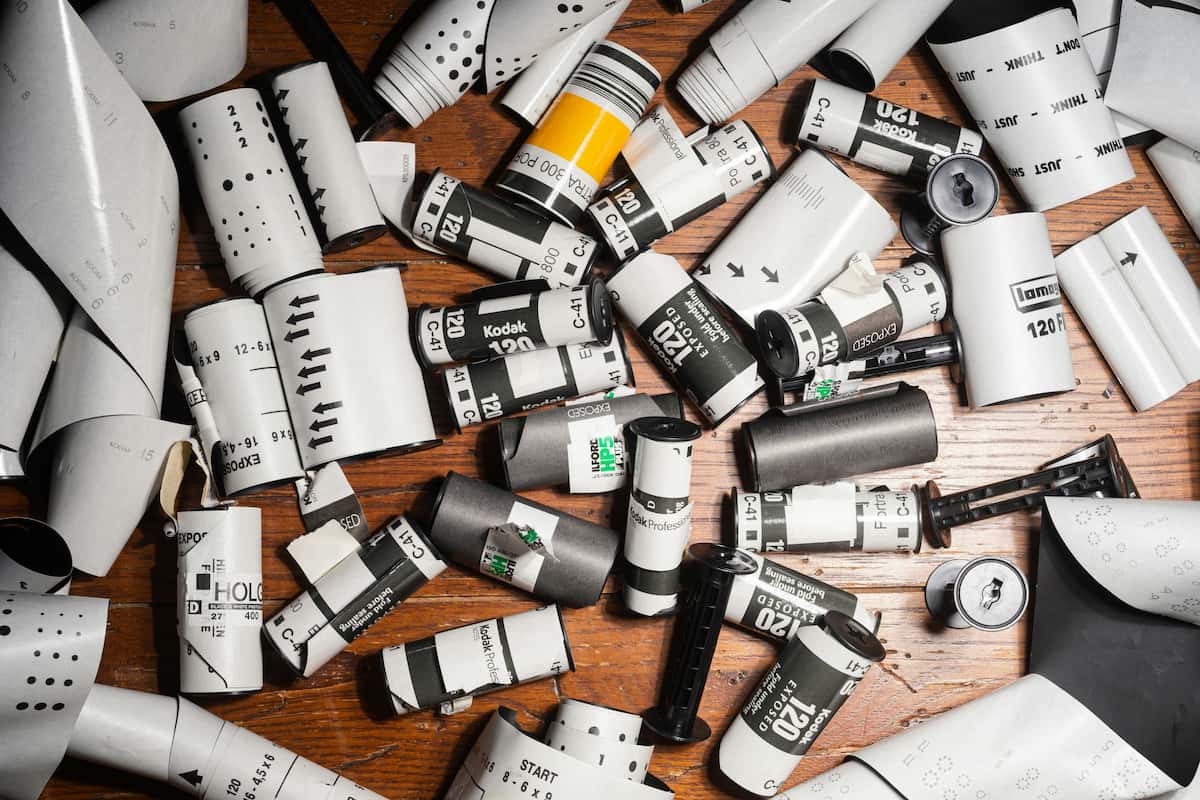
📏 Format Overview: The Basics
35mm Film (Also Called 135 Format)
- Film width: 35 millimeters
- Image size: 24mm × 36mm (roughly 1” × 1.5”)
- Images per roll: 24, 27, or 36 exposures typically
- Aspect ratio: 3:2 (same as most DSLRs)
- Also known as: 135 format, small format, full frame (in digital terms)
120 Film (Medium Format)
- Film width: 61 millimeters (about 2.4 inches)
- Image sizes: Varies by camera (6×4.5cm to 6×9cm most common)
- Images per roll: 8-16 exposures depending on camera format
- Aspect ratio: Varies (square, rectangular, panoramic options)
- Also known as: Medium format, 120 roll film
The Size Difference
Image area comparison:
- 35mm: ~864 square millimeters
- 6×4.5cm (645): ~1,680 square millimeters (nearly 2x larger)
- 6×6cm: ~3,600 square millimeters (over 4x larger)
- 6×7cm: ~4,200 square millimeters (nearly 5x larger)
This size difference affects image quality, depth of field, and enlargement potential significantly.
🎯 35mm Film: The Popular Choice
Advantages of 35mm
Cost Effectiveness:
- Lower film costs: $6-12 per roll vs $8-15+ for 120
- More shots per roll: 36 exposures vs 8-16 for medium format
- Cheaper processing: More labs offer competitive 35mm pricing
- Equipment costs: Wide range from budget to professional options
Convenience and Portability:
- Compact cameras: Easier to carry for extended periods
- Lightweight: Less fatigue during long shooting sessions
- Discrete shooting: Smaller cameras attract less attention
- Travel friendly: Easier to pack and transport
Technical Advantages:
- Faster shooting: Motor drives and autofocus available
- Extensive lens selection: Every focal length and specialty lens available
- Familiar handling: Similar to most digital cameras
- Reliable metering: Advanced exposure systems in many cameras
Learning Benefits:
- Lower pressure: More frames mean less anxiety about “perfect” shots
- Experimentation: Affordable to try different techniques and films
- Skill building: More opportunities to practice composition and exposure
- Immediate feedback: Higher volume shooting accelerates learning
Disadvantages of 35mm
Image Quality Limitations:
- Grain visibility: More apparent in enlargements beyond 8×10”
- Dynamic range: Less information captured compared to larger formats
- Depth of field: Harder to achieve extremely shallow focus
- Resolution limits: Maximum detail limited by small negative size
Creative Constraints:
- Fixed aspect ratio: 3:2 format may not suit all compositions
- Bokeh character: Different aesthetic from medium format shallow focus
- Enlargement limits: Quality degrades significantly in very large prints
Best 35mm Cameras for Beginners
Budget Options ($50-100):
- Canon AE-1 Program: Reliable, user-friendly, excellent lens selection
- Pentax K1000: Simple, mechanical, great for learning fundamentals
- Nikon FM: Professional build quality, manual operation
Mid-Range Options ($100-200):
- Canon A-1: Advanced features, multiple exposure modes
- Nikon FE: Aperture priority, compact, reliable
- Pentax ME Super: Small, lightweight, good automation
Premium Options ($200+):
- Canon F-1: Professional build, extensive system
- Nikon F3: Industry standard, exceptional viewfinder
- Pentax LX: Weather sealed, professional features
Need help choosing your first 35mm camera? Our best 35mm cameras for beginners guide provides detailed reviews and buying advice for affordable film cameras.
📷 120 Film: The Quality Choice
Advantages of 120 Film
Superior Image Quality:
- Finer grain structure: Less visible grain even in large enlargements
- Greater dynamic range: More detail in highlights and shadows
- Higher resolution: Significantly more detail than 35mm
- Better color depth: Richer, more nuanced color reproduction
Creative Benefits:
- Shallow depth of field: Easier to achieve with longer equivalent focal lengths
- Multiple aspect ratios: Square, rectangular, and panoramic options
- Unique aesthetic: Distinctive “medium format look”
- Large print potential: Excellent quality up to poster size and beyond
Professional Applications:
- Commercial viability: Standards in fashion, portrait, and art photography
- Gallery quality: Museum and fine art printing standards
- Wedding photography: Premium quality for important events
- Studio work: Excellent for controlled lighting situations
Disadvantages of 120 Film
Higher Costs:
- Film expense: $8-15+ per roll vs $6-12 for 35mm
- Fewer exposures: 8-16 shots vs 24-36 shots per roll
- Processing costs: Often more expensive, fewer lab options
- Camera investment: Quality cameras start around $200-300
Practical Challenges:
- Size and weight: Larger, heavier cameras less convenient for travel
- Slower operation: More deliberate shooting style required
- Learning curve: Manual focus and exposure more common
- Limited automation: Fewer cameras with advanced auto features
Technical Considerations:
- Focusing precision: Critical focus more important with shallow DOF
- Exposure accuracy: Less forgiving of exposure errors
- Handling care: Larger film more susceptible to damage
- Storage requirements: Takes more space for film and camera storage
Best 120 Cameras for Beginners
Budget Options ($150-300):
- Yashica Mat-124G: Twin lens reflex, reliable, affordable
- Mamiya C220/C330: Interchangeable lens TLR system
- Pentax 67 (older models): SLR-style operation, familiar handling
Mid-Range Options ($300-600):
- Mamiya RB67: Modular system, studio favorite
- Bronica SQ-A: Square format, professional features
- Pentax 67II: Updated version with improved features
Premium Options ($600+):
- Mamiya 7/7II: Rangefinder, exceptional lenses
- Contax 645: Autofocus, modern features
- Hasselblad 500C/M: Iconic modular system
💰 Cost Comparison Analysis
Initial Investment
35mm Setup:
- Camera body: $50-300 (used market)
- Standard lens: Often included or $30-100
- Basic accessories: $50-100 (strap, filters, bag)
- Total startup: $130-500
120 Setup:
- Camera body: $150-600 (used market)
- Standard lens: Often included or $100-300
- Basic accessories: $75-150 (strap, filters, bag)
- Total startup: $325-1,050
Ongoing Costs (Per Roll)
35mm Shooting:
- Film cost: $6-12 per roll
- Processing: $8-15 per roll (dev + scans)
- Cost per image: $0.39-0.75 per shot (36 exposures)
- Monthly budget (4 rolls): $56-108
120 Shooting:
- Film cost: $8-15 per roll
- Processing: $10-18 per roll (dev + scans)
- Cost per image: $1.50-2.75 per shot (12 exposures average)
- Monthly budget (4 rolls): $72-132
Annual Shooting Costs
Casual Shooter (24 rolls/year):
- 35mm: $336-648 annually
- 120: $432-792 annually
- Difference: ~$100-150 more for 120
Regular Shooter (52 rolls/year):
- 35mm: $728-1,404 annually
- 120: $936-1,716 annually
- Difference: ~$200-300 more for 120
Enthusiast (104 rolls/year):
- 35mm: $1,456-2,808 annually
- 120: $1,872-3,432 annually
- Difference: ~$400-600 more for 120
Understanding processing costs in detail? Our film processing costs guide breaks down pricing by format and service level to help you budget effectively.
🎨 Creative and Technical Differences
Depth of Field and Bokeh
35mm Characteristics:
- Moderate shallow focus: Requires faster lenses for significant background blur
- Longer working distances: Need to get closer for dramatic DOF effects
- Smaller bokeh circles: Background blur quality different from medium format
- Focus flexibility: Easier to achieve sharp focus throughout scene
120 Characteristics:
- Dramatic shallow focus: Even moderate apertures create significant background separation
- Shorter working distances: Natural subject isolation from normal distances
- Larger bokeh circles: Smoother, more attractive background blur
- Critical focusing: Precise focus more important due to shallow DOF
Aspect Ratios and Composition
35mm Format (3:2):
- Horizontal emphasis: Natural landscape orientation
- Familiar proportions: Similar to most digital cameras and prints
- Consistent framing: Same aspect ratio regardless of camera orientation
- Standard print sizes: Fits common frame sizes (4×6, 8×12)
120 Format Options:
- Square (6×6): Balanced composition, no preferred orientation
- Rectangular (6×4.5, 6×7): Various proportions for different aesthetics
- Panoramic (6×9, 6×12): Wide format for landscapes and group shots
- Creative flexibility: Multiple format options within same camera system
Image Quality Characteristics
35mm Image Quality:
- Grain structure: Visible grain adds character but limits enlargement
- Sharpness: Good detail resolution for prints up to 11×14”
- Tonal range: Adequate dynamic range for most subjects
- Color reproduction: Excellent with quality films and processing
120 Image Quality:
- Fine grain: Minimal grain visible even in large enlargements
- Exceptional sharpness: Superior detail resolution for large prints
- Extended tonal range: Greater dynamic range captures more scene detail
- Superior color: More nuanced color reproduction and gradation
🎯 Which Format Should You Choose?
Choose 35mm If You…
Prioritize Affordability:
- Limited budget for film and processing
- Want maximum shooting opportunities for your money
- Starting film photography as a hobby
- Need to practice and experiment extensively
Value Convenience:
- Plan to travel extensively with your camera
- Prefer lightweight, compact equipment
- Want discrete, street photography capability
- Like familiar DSLR-style handling
Are Learning Photography:
- New to manual exposure and focus
- Want to experiment with different techniques
- Need high volume practice opportunities
- Prefer lower pressure, more forgiving format
Shoot Casual/Documentary Style:
- Family events and everyday moments
- Street and travel photography
- Learning and experimentation
- Social media and web sharing primary use
Choose 120 If You…
Prioritize Image Quality:
- Plan to make large prints (16×20” and beyond)
- Want maximum detail and resolution
- Need professional-quality results
- Value superior tonal range and color
Enjoy Deliberate Photography:
- Prefer slower, more contemplative shooting
- Like planning and composing carefully
- Enjoy the ritual and craft of medium format
- Want to create portfolio-quality work
Have Photography Experience:
- Comfortable with manual focus and exposure
- Understand depth of field and composition principles
- Have steady hands for handheld shooting
- Can handle more complex camera operation
Plan Specific Applications:
- Portrait photography with beautiful bokeh
- Fine art and gallery exhibition work
- Wedding and event photography (professional)
- Architecture and landscape work requiring detail
🚀 Hybrid Approach: Why Not Both?
Starting with 35mm, Adding 120 Later
Recommended progression:
- Master 35mm basics (6-12 months)
- Develop personal style and preferences
- Add 120 for special projects when ready
- Use each format for its strengths
Dual Format Benefits
- 35mm for learning and high-volume shooting
- 120 for special occasions and quality work
- Different creative tools for different subjects
- Skill development across multiple formats
Budget-Friendly Transition
- Start with affordable 35mm camera and learn fundamentals
- Save money from 35mm shooting for 120 equipment
- Test 120 format with borrowed or rented equipment
- Gradual investment in 120 system over time
📝 Decision Framework
Ask Yourself These Questions
Budget Considerations:
- What’s my monthly film photography budget?
- How many rolls do I plan to shoot per month?
- Can I afford the higher per-shot cost of 120?
- Do I need to buy all equipment immediately?
Usage Intentions:
- What subjects will I primarily photograph?
- Do I plan to make large prints?
- Is this for learning or professional work?
- How important is portability for my shooting style?
Experience Level:
- Am I comfortable with manual camera operation?
- Have I used film cameras before?
- Do I understand exposure and focus principles?
- Can I handle the pressure of fewer shots per roll?
Long-term Goals:
- Where do I see my photography going?
- Am I interested in multiple formats eventually?
- Do I want to develop a specific style or aesthetic?
- Is this a hobby or potential professional pursuit?
🎬 Getting Started: First Steps
For 35mm Beginners
- Choose a reliable camera like Canon AE-1 or Pentax K1000
- Start with affordable film (Kodak Gold, Fuji C200)
- Find a local lab using our processing directory
- Shoot your first few rolls focusing on fundamentals
- Read our beginner’s lab guide for processing tips
For 120 Beginners
- Research camera systems thoroughly before purchasing
- Start with TLR cameras like Yashica Mat for affordability
- Buy premium film to maximize the format’s potential
- Find labs experienced with medium format processing
- Practice with manual focus before shooting important subjects
Hybrid Approach
- Begin with 35mm for 6-12 months
- Master exposure and composition fundamentals
- Research 120 options while building skills
- Try borrowed/rented 120 before purchasing
- Add 120 gradually as skills and budget allow
Budget-conscious approach? Our budget film photography guide shows how to start with either format while keeping costs manageable.
📚 Learning Resources
Essential Reading
- Camera manuals: Understand your specific camera’s operation
- Film photography forums: Real-world advice from experienced shooters
- YouTube channels: Visual learning for camera operation and techniques
- Local camera clubs: Hands-on learning and equipment trials
Recommended Practice
- Start with simple subjects: Build confidence before complex projects
- Keep shooting notes: Track settings and results for learning
- Compare formats: Shoot same subjects with different formats when possible
- Join communities: Learn from others’ experiences and mistakes
Film Recommendations
For 35mm Learning:
- Kodak Gold 200: Forgiving, affordable, good starting point
- Kodak Tri-X 400: Classic B&W for learning fundamentals
- Fuji C200: Natural colors, fine grain
For 120 Quality:
- Kodak Portra 400: Professional standard for portraits
- Ilford HP5 Plus: Excellent B&W medium format option
- Fuji Pro 400H: Beautiful color gradation
Choosing specific films? Our Kodak Tri-X 400 guide covers the most iconic B&W film, while our black & white film comparison helps you choose between different options.
Conclusion
The choice between 35mm and 120 film isn’t about which format is “better”—it’s about which format better serves your specific needs, budget, and creative goals. Both formats have produced countless iconic images and continue to inspire photographers worldwide.
For most beginners, 35mm offers the ideal starting point:
- Lower financial barrier to entry
- More forgiving learning environment
- Extensive camera and lens options
- Higher shooting volume for skill development
120 film becomes attractive as you grow:
- Superior image quality for serious work
- Unique aesthetic characteristics
- Professional applications
- Creative satisfaction from deliberate shooting
Key decision factors:
- Budget: 35mm more affordable for learning and experimentation
- Goals: 120 better for fine art, portraits, and professional work
- Experience: 35mm more forgiving for beginners
- Style: Each format encourages different approaches to photography
Remember that many successful photographers use both formats, choosing the right tool for each specific project. There’s no rush to decide permanently—start with what fits your current situation and evolve your kit as your skills and interests develop.
Understanding processing workflow? Our film processing workflow guide shows how to build efficient systems regardless of format choice.
Avoiding common mistakes? Read our film development mistakes guide to protect your investment in either format.
Ready to start shooting? Find quality processing services in our directory to bring your film photography vision to life, regardless of which format you choose.
Format comparison based on current market conditions and community feedback as of 7/16/2025. Camera and film prices vary by location and condition—always research current market values before purchasing.